Pages

NuffnangersX

Showing posts with label Beauty Tips. Show all posts

Wednesday, September 19, 2012

Dewy Face 101

Hello Hello Lovely Bellas!!

             Before anything else let me give you a big bear hug!! >^_____^<   OMG! I miss you all and I can't believe I finally got the chance to write here in my blog. I have been so busy with work and some other stuff.
But dont worry, I won't bore you telling the stories on why I've been gone for soooooo long. I wanna go straight ahead and write what I need to write before I get busy again.. Just using my lunchbreak for this. LOL ^__^

Dewy Face. That's something I wan to share with you.
 
I have been receiving questions on how to achieve a dewy skin. Honestly, I have no special routine on how to achieve this look. Here's how I do it:

1. Prep my face properly by cleansing,toning and moisturizing it. For my daily skin care routine click HERE . It's my skincare,foundation and brow routine all in one.
2. Like I said not special routine. I will probably depend the routine on the weather. Example, if the weather is too hot, I will put a little amount of BB cream/ foundation and then set it with dual foundation. However, if the weather is a little bit cooler, I can just set it with loose powder and voila! I'm done!

 See how easy it was for me?  I know we have different skin types so you have to get to know your skin first before you achieve a perfectly dewy skin. But wait there's more! If you want to have in depth tutorial on how to achieve dewy skin, the super cute Ms Andy of "Shimmering Thoughts" let me link her tutorial  on how to do a dewy makeup look. Click on her name below :

SHIMMERJJANG ANDY


There you have it and I hope you find this post helpful. I am looking forward to post more blogs again soon. 

I'll talk to you on my next blog! Thank you for reading.  Stay fabulous!


xoxo,
Miss Bee 


Saturday, May 19, 2012

Ferrero Rocher Instant Lipstick Holder

Hey Pretty Bellas

    Miss Bee here and I am back for another blog. I am not going to do a tutorial or product review about Ferrero Rocher. I'm sure you all know what Ferrero Rocher is so I'm gonna skip an intro for that.


I am sure most of you ladies got a box of this chocolate and I am pretty sure most of you didn't throw that little container away because it has a sentimental value. It's either you kept the love letters your bf gave you in it or just simply keep it somewhere because you think that you can use it for something.. Well Bellas, it's time for you to take it out from your storage box and put it on your vanity corner!

I had this idea while eating the chocolate. I was eating them and I suddenly look at my poor lipstick holder. And then it hit me. Why not make this Ferrero Rocher container as my lippies holder? I tried to put one lipstick on and VOILA! Pefect! I can't wait till I finish all the chocolates up.

So here are the photos of my new lipstick holder. It's nothing fancy...I didn't even put any design on it but you know you can always do that if you want to. It's just that, I like it better that way. Simple but very useful.


I used the lid for my potted individual eye shadows and brow powder. 


As you can see, that little something you value that's been sitting around in your storage box can be very useful. You can store anything you want it this clear container depending on your needs. Just be creative! 


I hope you find this blog helpful. Thank you for reading and I'll talk to you on my next blog! Stay Fabulous!


xoxo,
Miss Bee


Monday, March 5, 2012

Top 10 Makeup Kit Must Haves


Hello Gorgeous Ladies!

          Today I decided to write about your makeup kit essentials. Sometimes when we go shop for cosmetics we tend to buy the things that we dont really need or maybe we need but not at the moment and yes I am guilty of that. I'm the "OMG-this-is-cute-I-can-use-this-in-the-future" type of shopper before but let me tell you this..You dont need bunch of stuff to look beautiful..Only few essential items will do. So here are the list of the makeup kit must haves and I'll tell you why you need them.

1. Concealer
           - Huge eye baggies due to lack of sleep? Zit that strangely resembles Mt. Vesuvius? You're going to need a good concealer. It is your BFF when you're suffering from huge eye bags or zits. It simple covers up these things and it also helps even out the skin tone. Apply this under your eyes and on some part that needs coverage such as around your nose area, around your mouth and on some acne scars. When you have fresh pimple, it is best to use a pimple concealer or any concealer that has tea tree oil in it. I personally dont like to cover up my pimples if they're not dry yet but good thing there are concealers with tea tree oil. Now it can be your  bestfriend if you have acne prone skin.

Recommended products:
Body Shop Concealer with tea tree oil
Fanny Serrano concealer (the green one)
Careline Pimple concealer with tea tree oil


2. Foundation
           -  We all know that a house or a building needs a good foundation. Well so does our face! A good foundation (liquid or cream) is one of the makeup kit must haves! It can make a difference in your makeup. Although finding the right one for us may be hard, never give up until you find the right one for you. A good alternative for foundation is BB cream. If you dont have a lot to cover up of if you like a light coverage but still flawless looking skin, try this out. Here are some tips on how to find the right foundation for you.
* before buying a foundation, check how it oxidizes on your skin.
* Apply it on your jaw not your hands because you'll have a better look of what the product will turn out after it oxidizes.
* to find the right shade of foundation, match it with your collarbone instead of your neck.
* if you have excessive oily skin, use gel foundation instead.

Recommended Products:
High end: MAC,Makeup Forever, Bobbi Brown, Chanel
Drugstore:
Revlon Colorstay
Ever Bilena Stick foundation
Maybelline Gel Foundation
BB Cream: Missha or Skinfood

3. Dual powder foundation
              - Even with the presence of liquid or cream foundation, a dual powder foundation a.k.a 2 way cake foundation is definitely a must have. You can choose between this or liquid foundation but as for me, a dual powder foundation is very important. First, you can use it if you want a lighter coverage during the day and you can wet your sponge and apply this powder for full coverage.

Recommended Products:
Fanny Serrano 2-way cake foundation
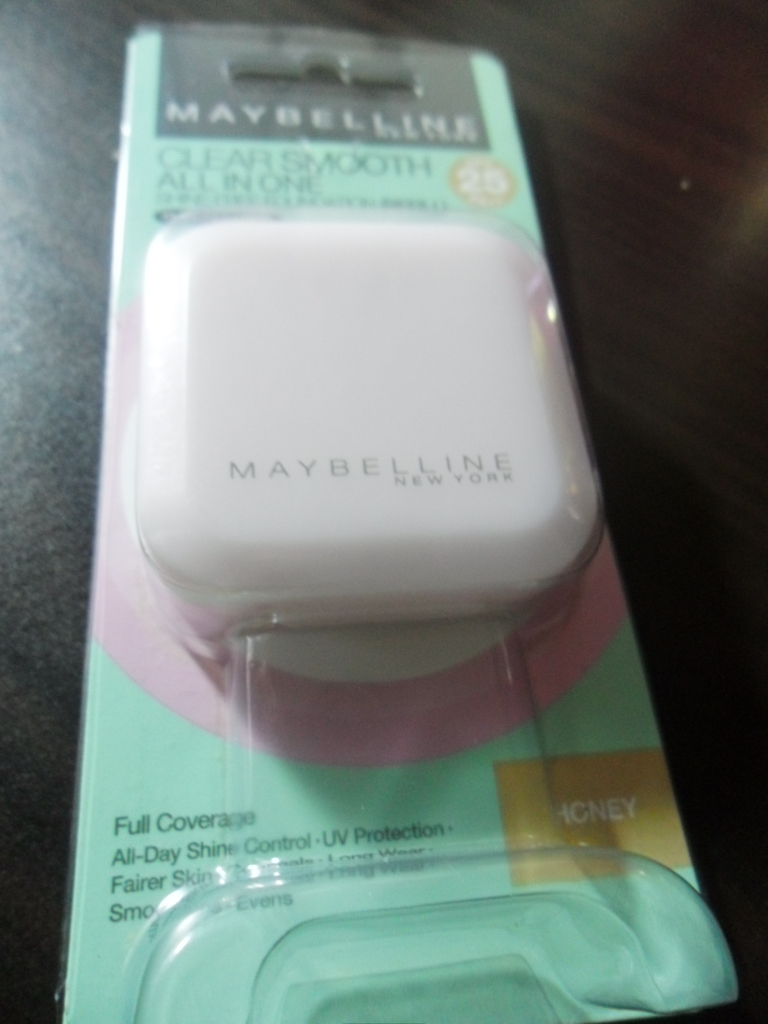
Maybelline Clear Smooth all in one Shine free cake powder


4. Eyebrow Kit
                - There is nothing wrong with filling in your eyebrows if it's needed. You can define your eyebrows depending on the look you're trying to achieve. An eyebrow kit and brow brush are the things that you need. You can also have brow pencil instead of eyebrow kit. As for me, I have both and I use them all at once.

Recommended Products:
ELF eyebrow Kit
Nichido mineral pencil


5. Eyeshadow Palette
                  - I think this is what most girls get excited about when they go shopping for cosmetics.  "We" women just can't get enough of eye shadow palettes. It's probably because we always want our eyes to be the center of attraction. Anyway, if you're on a budget but you still want to look amazing, you could never go wrong with neutral shades. They're perfect for day and night. Take the lighter shades for daytime and take the darker ones to deepen up the eye makeup for that sexy evening makeup. You can go from office chic to glamorous evening gal.

Tip: Find a palette that comes with a blush.

Recommended Products:
Revlon Colorstay 12 hour eye shadow
Nichido Natural Beauty palette (this comes with 2 shades of blush)
Estee Lauder Pure Color (this also comes with 1 pink blush)
NYX Nude on Nude Natural Look Kit (this comes with 2 lip shades)


6. Eyeliner
                  - An eyeliner can make a huge difference in your eyes. Just like the eye brows, you can apply it anyway you want depending on the look you're aiming for. When applying eyeliner, you should always take your time because it's really hard when you mess it up. Plan ahead. Make sure you already know what kind of eye makeup you're trying to achieve so that when you stroke your fabulous liner, it will look really gorgeous!

Recommended Products
NYX Skinny liner
Maybelline gel liner
Nichido Mineral Precise liner


7. Mascara
               - Just like the eyeliner, mascara can make a huge difference with your eye makeup. It will open up your eyes more and make it look brighter and sexier.

tip: always go for a waterproof mascara.

Recommended products:
Maybelline Extreme Stiletto
Majorlica Majorca

8. Blush
             - In case you dont have a palette that comes with a blush or you just prefer to have a separate blush palette, blush on is definitely a makeup kit must have. This will automatically give you a radiant glow.

Recommended Products:
ELF blush
Ever Bilena Mousse blush
San San Mousse blush


9. Lip Products
             - Keeping lip products in your makeup kit is very important no matter what look you're tying to achieve. It is important to have lipstick, lip gloss and lip balm in your kit. In my opinion, keeping a coral peach lipstick is the best choice if you don't want to buy a whole bunch of lipstick shades. Coral peach color can go well in any type of makeup be it daytime of night, neutral everyday makeup or sexy smokey eyes. It's just perfect..Well, this is just my opinion. I know we all have our own preference. Anyway as for lipgloss, it can automatically make your lipds more moisturized just in case you forgot your lip balm. And last but not the list, lip balm. It's important to keep this because it locks in the moisture on lips.

Recommended products:
lip balm: EOS, Etude House, Watsons, Maybelline


10. Oil Blotting Sheet
               - This is probably the product that some girls forget. Oil blotting sheet is as important as the other cosmetic products in our kit. I know a lot of you know what it's for but let me remind you that before doing a touch up of your powder, use the blotting sheet to absorb the oil on your face.

Recommeded Products:
Kleenex oil control sheet
Watsons Oil Control Sheet

    So there you have my top 10 makeup kit must haves. I hope you find this blog helpful. I will talk to you on my next blog. Thanks for reading and Stay Fabulous!


xoxo,

Miss Bee


Monday, February 20, 2012

DIY Iced Green Tea Eye Pads- Bid Puffy Eyes Goodbye!

Hello Everyone,

     Have you ever suffered from swollen eyes due to lack of sleep, astigmatism or from crying yourself to sleep last night because you broke up with your bf/gf? swollen eyes can make us look tired even after sleeping for 8hrs.You can also get puffy eyes by drinking water too much before going to bed. Although you can get a lot of good health benefits by drinking a lot of water everyday, drinking water before bed will cause your eyes to swell. That's because the water will not be eliminated from your body when you sleep.

    Anyway, I've suffered from this too many times before so I tried to look for some ways on how to reduce this or totally get rid of the annoying puffy eyes.I swear by Purederm Puffy Eyes Minimizing Patche.  It  will totally get rid of your eye bags in just one night. But this is too expensive to use on a daily basis plus it will only minimize the under eye bags. Sometimes, when you suffer from astigmatism, you tend to get swollen eyes in the morning as if you just got bitten by some insects or sometimes when you cry yourself to sleep your lids tend to become puffy as well.

   While I was enjoying my cup of green tea, I thought that maybe I can make my own eye pads using this. Green tea has a lot of health benefits. Is there any other food or drink reported as many benefits as green tea? There are a lot of medicinal benefits that you can get from green tea from headache to depression. It is also reputed to be helpful to some illnesses such as cancer, high cholesterol level, infection, etc.

 So enough of the blah blah blah and let's get started!

What You'll Need:
1 green tea bag
1 cup hot water
cotton pads
ziplock or any plastic container


1. Put the tea bag onto the cup of water. The let it cool down a little bit.
2. Once the tea is warm, you can start to dip each cotton pad into it.
3. Put the dipped cotton pads in a ziploc or plastic container but make sure not to layer them.
4. Let it totally cool down then put it in a fridge and there you have it!

        You can make as many pads as you can. This will save you time and energy :)
this can only fit 4 but I still put 6..


REMINDER: dont pile them up because it will be so hard to tore them apart... LEARN FROM MY MISTAKE :(


so this happens when you pile them up..

You can start to use it the next day. Thaw it out first before you place it on your eyes. Go ahead and wash your face first or take a shower. It will be ready by the time you done. These eye pads have soothing effect and can help your blood to circulate better.


           For best result, use this every morning right after you wash your face. This will take 10minutes of your daily morning routine but it sure pays. :) You will bid puffy eyes in no time!!! You can also put these pads all over your face at night. You face needs some green tea lovin' too so go ahead and use it as face mask.

Other things I do with green tea:
  I use it to rinse my face at night. So once you wash you face with a cleanser, rinse it with warm green tea.
  When steaming my face, I dont just use hot water. I add some green tea into it. You dont have to use new tea bag all the time. When I drink tea, I keep the tea bag so I can use it for my facial steam. (tutorial coming up next...)


       I hope you enjoy my DIY tutorial and for more updates, please visit my FB page and twitter and dont forget to subscribe to my YT channel too! This is all for now ladies and I'll talk to you on my next blog!


xoxo,
Miss Bee


Sunday, February 12, 2012

Bee's Brow Routine


Hello Gorgeous!


 Filling in my brows was the first makeup routine I got totally interested in because I barely have brows. The hair in my brows iss very thin so when I was a kid I always felt like there's something missing in my face. It was only until I reached my teenage years that I got totally conscious about it. I didn't know how to do my brows back then but since I want it to change, I tried to buy a black liner from ever bilena. I swear I had no idea what I was doing then. I lined my brows without even grooming them. Then one of my cousin-in-law's mom taught me how to do it properly and she advised me to get a brown brow pencil instead of black. So that's how I started learning more about my brows. I used one product to another. It was hard to find the right one for me. I also switched from one routine to another. It was just recently that I learned to blend and brush my brows and I loved it since. My bff is my double side brush from Marionnaud. :)

 Anyway, enough of my brow history and let's jump into everything!


Preparation
   In preparing your brows, you have to make sure that they are properly groomed. Some people have it done professionally but in my opinion, you really have to learn how to groom your brows so that you can do it whenever you need to plus I am more confident that I'm not gonna walk out of the salon looking like I just got the villain role on the next TV drama series. Anyway when grooming your brows, you can either use this blade that I got from Watson's or use tweezers.

  When you're done grooming your brows, we can go ahead and jump into everything.

What I'm going to do is show you how I do my brows from the simple one to a more defined one.

1. Get a brow pencil that is 2 shades darker than your hair or always remember that your hair color should always be lighter than your brows. Avoid extreme contrast.

2. Start lining it lightly from the arch toward the end. To get the perfect arch of your brows, look straight in the mirror and get a pencil. You should create your arch on the outer end of your iris. Some people really do the perfect ever so archy arch..I know I'm just making up some words right now but what I want to say is that, you shouldn't make your arch too high because that will just add up age. Anyway, What I do is I just follow the natural arch of my brows and sometimes put it slightly higher. This will make you look a lot younger at least you wont look older than your age.

3. So when you're done finding the arch and lining your brows halfway out, you can lightly build up inwards. Then brush it using this Marionnaud 2 in 1 premium brush  (brow brush and angled brush) then start blending using the brow brush.. Blend it well and brush it upward when you reach the inner part of your brows.  Now this is my everyday brow routine when I'm just having my classes and I'm not planning to go out. I can go on all day working with just this.

4. Anyway, we can build this up by adding few more steps and using 1 more product. When I'm going out, I always make sure I use brow gel because it helps my brows stay in place. So using my E.L.F. brow kit, I'm going to take the brow gel and mix it with the brow powder using an angled brush then doing the same step I did with the brow pencil, I'm gonna line my brows and then blend and brush..blend and brush until I'm satisfied.
5. To clean off the excess, use a concealer and apply it on your brow bone and upper brow just like so..Then start to blend it to your skin.  Doing so will not only make your brows a lot cleaner but it will also make the brows look more defined.

 And we're done! I hope you find this tutorial helpful. Dont forget to subscribe to my YT channel for more tutorials and please do check out my facebook and show some love! Oh wait there's more! the bird is tweeting and it's saying dont forget to follow me on twitter too! I will put all the necessary link on the info box below including the products I used and Where I got them.

Thanks for reading darlings and I'll talk to you on my next blog! Stay Fabulous.


xoxo,
Miss Bee

Thursday, January 26, 2012

No Makeup Makeup

Hey Everyone,

      When I posted my picture with my no makeup makeup, people asked me how I did it. Well, honestly, there are several ways to achieve this look. If you only search in youtube, you'll see tons of videos on how to get the "no makeup" makeup/fresh makeup/natural makeup or however you want to call it. This type of look will help you have a radiant looking skin without putting a lot on your face. This will just enhance your features and give you that effortless beauty. You will see a lot but you may probably think twice in doing this look because of the products they are using. Well, I will make it easier for you pretty girls out there. I will show you different techniques on how to achieve this look using local products such as Nichido, Ever Bilena and so on. I will also make a tutorial based on your skin type.

      So this first tutorial is for girls who doesn't need a lot of coverage on their skin. Meaning to say your skin has very few blemishes or none at all. Honestly when I did this video, my skin was not at its best. Right now, I am suffering from acne scars but when I did this video, my skin was a little worse that it really is. Anyway, just dont mind my skin and focus on the tutorial.


 So here are the products I used:

Face:
Missha Real Complete BB Cream
Ever Bilena Advance Foundation stick
San San Age defense concealer
Ever Bilena Advance 3D Compact

Eyes:
Nichido Palette
NYX nude on nude
Nichido eye pencil in medium brown
Nichido Lengthening Mascara
Brows: Nichido Mineral eye pencil in Chestnut

Blush: Estee Lauder Pure Color palette ( Radiant kiss)

Lips: Watsons Naturals lip balm and Missha lipstick


Detailed tutorial:

1. Clean your face, use toner and moisturize. It is very important that you do this first step before your start applying makeup. 
2. Put an ample amount of BB cream onto your fingertips and then warm it up. Gently apply the product  all over your face. You can use a foundation brush if you want or if you're doing it to somebody. In my case, I prefer to use my fingers to blend the product more evenly.
3. Apply foundation that is lighter than your skin tone under your eyes and apply it in triangular motion to brighten up the face even more and for more coverage if you need it.
4. This is optional but you can apply concealer under your eyes,some dark spots and acne scars. In my case, it didn't totally concealed the acne because it's just came out. (Blame it on PMS :(.....)
5. Redefine your brows. In this video, since I forgot that I am doing a natural look, I forgot to use darker shade of brow pencil and just follow the natural shape of my brows. 
6. Apply primer but this is optional since we aare aiming for a natural look. If you dont have a primer, you can apply foundation all over your lids and top it off with concealer.
7. Apply a matte brown eye shadow on your eye socket to give your eyes more definition. Then apply a satin eye shadow of  your choice. Blend it well. Applying satin E/S will give you a natural looking glow. 
8. Tight line using a medium brown eye pencil. Apply it as close to the lash line as possible. Doing this method will make your eyelashes appera thicker without lining it too much plus the brown liner looks more natural than black liner.
9. I used a different technique in applying mascara here. I noticed that doing this will make your lashes look more natural than when you use the mascara's regular wand. Anyway, apply some mascara onto the brow and lash comb and then after you curl your lashes, gently comb your top and bottom lashes
10. Apply powder. Here I am using my new Ever Bilena Advance 3D compact. I will do a review soon on Ever Bilena products.
11. Using the darkest shade in the 3d compact, apply it on the hollows of your cheeks for contour. 
12. Apply pink blush on your cheek bones. Here I am using a satin pink from my Estee  Lauder palette but you can use any pink blush you have.
13. Using the lightest color on the 3d compact, apply it on top of your cheek bones then sweep it under your eyes for highlight. You can also apply some on your nose bridge and across your forehead.
14. Dab a little bit of liptick on your lips then blend it with your finger or lip brush.
Last but not the least, apply lipbalm for extra moisture. 


  So there you have it. No makeup makeup... Enhanced but not overdone. 


I hope you enjoy reading my blog and please check out my YT channel and subscribe for more tutorials. This is all for now and I'll talk to you on my next blog. Stay Fabulous. 


xoxo,
Bee. 


Tuesday, January 24, 2012

DIY Body/Face/Lip Scrub

Hey Everyone,

     Tonight as I was doing my other blog,I thought of writing a tutorial on how to do a body scrub. This is all naturals and you can definitely find the ingredients in your own kitchen. Yup! You heard it right...In your kitchen or as I call it my extended vanity corner. LOL :) I get some of my beauty remedies from my kitchen. One of the products I swear by is honey so I am going to tell you how to make a scrub that will work best on your face body and including your lips.

   So here's what you'll need: honey, sugar, olive oil (optional)

      Before we get started, let me just give you an introduction about the health benefits of these ingredients.

Honey: It's definitely one of the best product you can use on your skin. Honey is 100% natural so it is safe to use on your skin. It has a lot of good benefits not only for the skin but for your health in general. It has the ability to absorb and retain moisture on your skin. This will help you to have a silky smooth skin.Believe me, I saw the big difference on my skin ever since I started using honey as one of my beauty remedies.


Sugar: It can exfoliate your skin and deep cleanse it. It can also hydrate your skin without clogging your pores. This can help your skin to glow as well. There are so many benefits that you can get for using sugar as your over all body scrub.


 These two ingredients alone can do wonders on your skin but if your skin is super dry, you may want to add a little bit of olive oil for extra moisture. If you dont have olive oil, you can try to use baby oil or even the home made coconut oil. The one that we get when we make "latik" out of coconut milk. It is also good but the smell for me is not very pleasing. Anyway, I cannot stress it more PLEASE DONT USE COOKING OIL. :) LOL

 Anyway, let's get started. Here's what you need to do:

- You'll need at least 3 tablespoon of white sugar if you're planning to use this as an over all scrub.
-Add 2 tablespoon of honey and then mix well and there you have your all naturals body scrub.

You may want to lessen the ingredients when you're not planning to use it all over your body. I like to chill this scrub first before I use it because it's more refreshing. And just like what I said earlier, you can add olive oil if you want. Try to exfoliate your skin at least 2x and you'll see the result in just a week. :)

  This is all for now and I do hope you like my very first DIY beauty remedy tutorial. Watch out for more tutorials soon. Thank you for reading and have a good one :) Stay Fabulous


xoxo,

Bee

Tuesday, January 17, 2012

Bee's Everyday Make up

Hello Gorgeous Ladies,

     I decided to film a tutorial after a stressful day. What I'm gonna show is the make up look I had when I attended my first day at the beauty academy. It's a very simple look. Kinda like smokey eye but it's just appropriate for daytime. I had a hard time showing the palette I used for this look so I decided to take a picture of my Estee Lauder Pure Color.

Estee Lauder Pure Color Palette
Colors I used; White, peach and brown for eyes
Blush: radiant kiss
   Products I used:
Face: Revlon Color Stay Foundation, Ever Bilena Concealer
Eyes and Cheek: Estee Lauder
Lips: Maybelline Color Sensation in Angel Rose and Fashion 21 lip cream


  I was really tired when I did this so forgive my bloodshot eyes. I was about to wash my face when I decided to just go ahead and film the tutorial.


   I know it didn't look good enough but I am planning to recreate this look using same technique but different colors.

   This is all for now and I do hope you like reading my blog. Please check out my youutube channel and subscribe. Thank you for reading and have a fabulous day ahead.


xoxo,
Bee