Pages

NuffnangersX

Thursday, March 15, 2012

Product Review: Skin and Hair Products (Dove Hair care, Asian Secrets and Vaseline Healthy White)


Hello Gorgeous! 

    Since I have a lot of time today, I decided to do a product review of the new products I tried for the past couple of weeks. 


Asian Secret Lulur Body Scrub
   I saw this before in a tv ad but I never thought I would be interested in using this. I've been thinking of trying this out long time ago but I just got scared. Until my cousin won some of these in a blog giveaway and then she did a review telling that it's a good product to try. And also my other cousins and aunt are using it as well so I immediately added this product on my shopping list.

So I've been using this product for 2 weeks now and I am lovin' this product. I totally forgot about making DIY body scrub because of this. I noticed that for the past 2 weeks, some of my dark spots lighten up and I always feel clean and fresh after taking a shower. I definitely recommend this product. It's cheap and very effective!

Pros: lighten dark spots in just few weeks (use at least 3x a week)
        the scents stays in you for a long time

Cons: I can't write any bad review on this products yet.


Dove Hair Care - Damage Theraphy

    I've been a dove user for years and I am really in love with the soap. So I got so excited when I saw the shampoo ad on tv. I didn't get it right away of course but I was so happy when I first tried it. My hair was so soft and it's not frizzy and I must say, touching my hair became my obsession (where's John Lloyd when you need him?)
Anyway, I love this product but one thing I noticed is that my hair fall increased..Like I really got scared... But I am not going to discontinue this until I consume everything. I think they have one for hair fall so I'm going to try that out.

Pros: instantly gives you softer hair and the scent lasts all day.
Cons: hair fall increased
Vaseline Healthy White

   
I've been using this product for a long time but I discontinued not because I wasn't satisfied anymore but because I just wanted to try new ones. But now, I am back with my old love.. :) Since, the summer heat is coming I needed extra protection and only Vaseline Healthy white can do that. It has SPF 24 which can protect you from the harsh UV rays. Vaseline healthy white also helps you to have even skin tone.


     So there you have my review for these products. Remember that, the results can vary depending on your skin type. This is just my honest opinion about the products.

Thank you for reading and Stay fabulous!


xoxo,
Miss Bee

Tuesday, March 13, 2012

Makeup Trend 2012: Bright Eyeliner


Hey Pretty Ladies!

      As we all know summer is fast approaching and I am just loving the colors for this season. I am not a summer person but I dont know what got into me but except for the scorching heat, I am so lovin SUMMER season. I am so excited to go shopping for summer outfits which I dont normally do and I can't wait to go to the beach and get myself tanned (again..this is totally not me). So I can say that I am not being me this season. I don't want to take it negatively and I hope you do the same. I am just embracing new stuff lately. I feel like I was so trapped in my own world and that is just gloomy.. And the colors that I used to love reflected on my life. Again, dont get me wrong.. I am happy with my life but it just feels like it's not enough. It's really hard to explain and maybe I am just not good at expressing myself well. Anyway, lately bright colors always catch my attention and I just love how these colors automatically shift my mood. I feel really happy when  I see bright colors so I thought "why not wear them?". I decided to always add bright colors in my outfit whenever I go out but hey, I love wearing bright makeup too so when I saw a picture of a model wearing bright eyeliner from Mally Beauty's FB page, I instantly fell in love with it. I know that bright eyeliner will be the trent for Sping this 2012 and I told myself that I would definitely wear it a lot!!!

      Anyway, enough of the blah-blah-blah.. I think I always do that a lot in my blogs. So...let's jump into the tutorial if you want to learn how I did the look.


Products I used:
Face:
Missha BB cream
Ever BIlena Advance stick foundation
Ever bilena Advance concealer
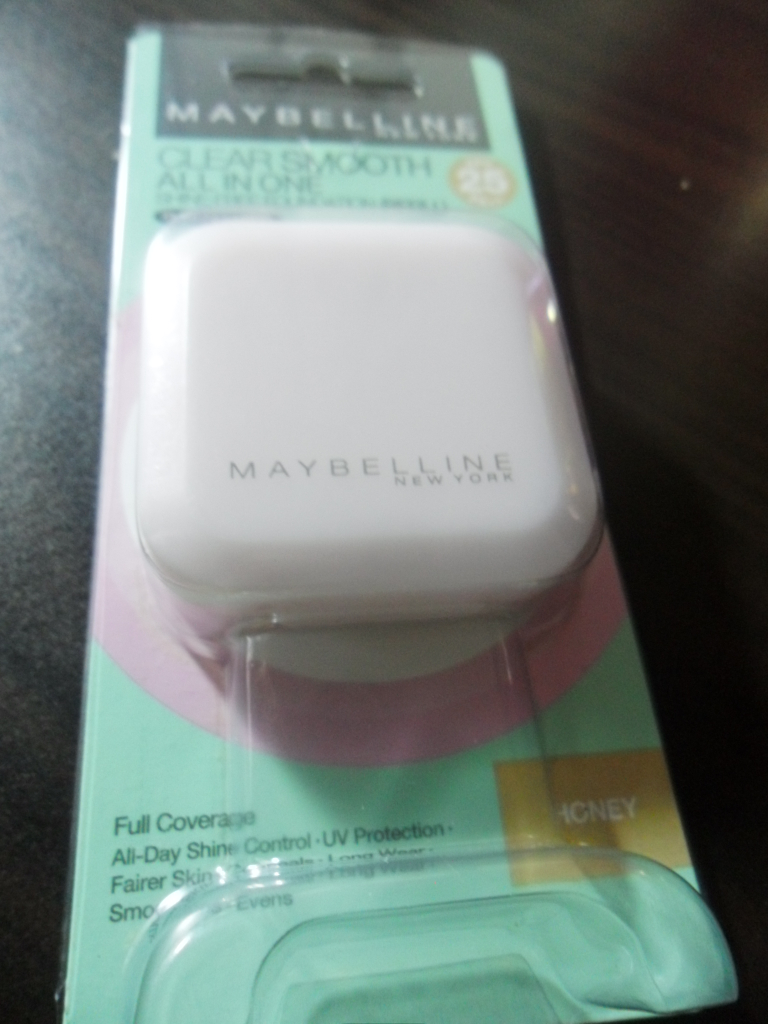
Maybelline all in one clear smooth dual powder

Eyes:
James Cooper brow pencil
Estee Lauder Pure color palette
Lulu Makeup Beverly hills palette

Cheeks:
Estee Lauder Pure color palette

Lips: Lulu makeup Beverly hills palette


Featured Product
Procedure:
 As always I prep my face with toner, moisturizer and  primer. I also applied BB cream first as  a base. 

Eyes:
   First prime your lids. 
   Next thing that you need to do is take a taupe eye shadow and apply it on your crease. This will give definition to your eyes. 

   Now, for the bright eyeliner, you can use bright liquid liner to make this so much easier. But as for me, I dont have any bright liners so take an eyeliner brush and spray a little bit of water. Dip it into any bright eye shades that you want. The brighter the happier :) Apply it anyway you want.. You can apply a thin one, you can do a cateye..Wing it  out and so on.. In the look that I did in my video, I didn't apply anything on my lower lash line but you can also apply the liner there. You can also extend it a little bit more on the inner corner of your eyes. You can do it anyway you want. 

   Next is tightline your eyes. You have many ways to do this. You can use liquid liner gel liner and so on...But I am just lovin a more natural looking line so take another eyeliner brush, spray a little bit of water and then take any matte black shadow that your have and apply it as close to your lash line as possible. 

   Last thing for your eyes, curl your lashes and apply mascara. 

Now more for the face:
    Just like what I always do, I apply foundation after I did my eye makeup. I also applied concealer under my eyes then set it with a powder. 

note: You can do this step before the eye makeup if you want to. 

For blush I used my all time fave palette but you can use any pink blush that you have. 

For the lips, I applied nude pink lipstick from the beverly hills palette. I also think that a bright pink lips would go so well with the eye makeup. 

And Voila! There you have my version of bright eyeliner. I will post more pictures on my TUMBLR . 

I hope you enjoy this blog tutorial and I will talk to you again on my next blog. 

Thanks for reading and Stay Fabulous

happy me :)
xoxo,


Miss Bee
     

Monday, March 5, 2012

Top 10 Makeup Kit Must Haves


Hello Gorgeous Ladies!

          Today I decided to write about your makeup kit essentials. Sometimes when we go shop for cosmetics we tend to buy the things that we dont really need or maybe we need but not at the moment and yes I am guilty of that. I'm the "OMG-this-is-cute-I-can-use-this-in-the-future" type of shopper before but let me tell you this..You dont need bunch of stuff to look beautiful..Only few essential items will do. So here are the list of the makeup kit must haves and I'll tell you why you need them.

1. Concealer
           - Huge eye baggies due to lack of sleep? Zit that strangely resembles Mt. Vesuvius? You're going to need a good concealer. It is your BFF when you're suffering from huge eye bags or zits. It simple covers up these things and it also helps even out the skin tone. Apply this under your eyes and on some part that needs coverage such as around your nose area, around your mouth and on some acne scars. When you have fresh pimple, it is best to use a pimple concealer or any concealer that has tea tree oil in it. I personally dont like to cover up my pimples if they're not dry yet but good thing there are concealers with tea tree oil. Now it can be your  bestfriend if you have acne prone skin.

Recommended products:
Body Shop Concealer with tea tree oil
Fanny Serrano concealer (the green one)
Careline Pimple concealer with tea tree oil


2. Foundation
           -  We all know that a house or a building needs a good foundation. Well so does our face! A good foundation (liquid or cream) is one of the makeup kit must haves! It can make a difference in your makeup. Although finding the right one for us may be hard, never give up until you find the right one for you. A good alternative for foundation is BB cream. If you dont have a lot to cover up of if you like a light coverage but still flawless looking skin, try this out. Here are some tips on how to find the right foundation for you.
* before buying a foundation, check how it oxidizes on your skin.
* Apply it on your jaw not your hands because you'll have a better look of what the product will turn out after it oxidizes.
* to find the right shade of foundation, match it with your collarbone instead of your neck.
* if you have excessive oily skin, use gel foundation instead.

Recommended Products:
High end: MAC,Makeup Forever, Bobbi Brown, Chanel
Drugstore:
Revlon Colorstay
Ever Bilena Stick foundation
Maybelline Gel Foundation
BB Cream: Missha or Skinfood

3. Dual powder foundation
              - Even with the presence of liquid or cream foundation, a dual powder foundation a.k.a 2 way cake foundation is definitely a must have. You can choose between this or liquid foundation but as for me, a dual powder foundation is very important. First, you can use it if you want a lighter coverage during the day and you can wet your sponge and apply this powder for full coverage.

Recommended Products:
Fanny Serrano 2-way cake foundation
Maybelline Clear Smooth all in one Shine free cake powder


4. Eyebrow Kit
                - There is nothing wrong with filling in your eyebrows if it's needed. You can define your eyebrows depending on the look you're trying to achieve. An eyebrow kit and brow brush are the things that you need. You can also have brow pencil instead of eyebrow kit. As for me, I have both and I use them all at once.

Recommended Products:
ELF eyebrow Kit
Nichido mineral pencil


5. Eyeshadow Palette
                  - I think this is what most girls get excited about when they go shopping for cosmetics.  "We" women just can't get enough of eye shadow palettes. It's probably because we always want our eyes to be the center of attraction. Anyway, if you're on a budget but you still want to look amazing, you could never go wrong with neutral shades. They're perfect for day and night. Take the lighter shades for daytime and take the darker ones to deepen up the eye makeup for that sexy evening makeup. You can go from office chic to glamorous evening gal.

Tip: Find a palette that comes with a blush.

Recommended Products:
Revlon Colorstay 12 hour eye shadow
Nichido Natural Beauty palette (this comes with 2 shades of blush)
Estee Lauder Pure Color (this also comes with 1 pink blush)
NYX Nude on Nude Natural Look Kit (this comes with 2 lip shades)


6. Eyeliner
                  - An eyeliner can make a huge difference in your eyes. Just like the eye brows, you can apply it anyway you want depending on the look you're aiming for. When applying eyeliner, you should always take your time because it's really hard when you mess it up. Plan ahead. Make sure you already know what kind of eye makeup you're trying to achieve so that when you stroke your fabulous liner, it will look really gorgeous!

Recommended Products
NYX Skinny liner
Maybelline gel liner
Nichido Mineral Precise liner


7. Mascara
               - Just like the eyeliner, mascara can make a huge difference with your eye makeup. It will open up your eyes more and make it look brighter and sexier.

tip: always go for a waterproof mascara.

Recommended products:
Maybelline Extreme Stiletto
Majorlica Majorca

8. Blush
             - In case you dont have a palette that comes with a blush or you just prefer to have a separate blush palette, blush on is definitely a makeup kit must have. This will automatically give you a radiant glow.

Recommended Products:
ELF blush
Ever Bilena Mousse blush
San San Mousse blush


9. Lip Products
             - Keeping lip products in your makeup kit is very important no matter what look you're tying to achieve. It is important to have lipstick, lip gloss and lip balm in your kit. In my opinion, keeping a coral peach lipstick is the best choice if you don't want to buy a whole bunch of lipstick shades. Coral peach color can go well in any type of makeup be it daytime of night, neutral everyday makeup or sexy smokey eyes. It's just perfect..Well, this is just my opinion. I know we all have our own preference. Anyway as for lipgloss, it can automatically make your lipds more moisturized just in case you forgot your lip balm. And last but not the list, lip balm. It's important to keep this because it locks in the moisture on lips.

Recommended products:
lip balm: EOS, Etude House, Watsons, Maybelline


10. Oil Blotting Sheet
               - This is probably the product that some girls forget. Oil blotting sheet is as important as the other cosmetic products in our kit. I know a lot of you know what it's for but let me remind you that before doing a touch up of your powder, use the blotting sheet to absorb the oil on your face.

Recommeded Products:
Kleenex oil control sheet
Watsons Oil Control Sheet

    So there you have my top 10 makeup kit must haves. I hope you find this blog helpful. I will talk to you on my next blog. Thanks for reading and Stay Fabulous!


xoxo,

Miss Bee


Sunday, March 4, 2012

Kim Nana Inspired "No Makeup" Makeup and Usamimi Headband


Hey Everyone,

     I am a big fan of Lee Min Ho and I dont know why it took me a lot of courage to start watching his drama series "City Hunter". Maybe because I know myself. I know that once I start watching, I will not be able to stop. Well, it actually happened. I was able to finish the whole series for 1 week. Anyway, if you're watching this series, you probably know Kim Nana (Park Min Young). In the series, she wore this cute headband and it was only until last weekend when I found out that it's called a wireband. It is actually called Usamimi in Japan. When City Hunter aired in Korea, my student told me that they raved over this headband and I am so glad that I found this in Alabang Town Center. It's a little more expensive than what I would spend for a single headband but I really thought that it's worth it.

    I decided to make another "no makeup" makeup tutorial but this time, I'm gonna use different techniques plus I'm gonna use my "Usamimi" headband so yeah..let's get started!!!

Step by Step

1. Apply BB cream all over your face and apply some on your neck.
2. Apply concealer in a triangular motion and blend well. This will highlight your face even more.
3. Take a light eyeshadow and apply it on your lids.
4. Take the taupe shade and apply it on your crease area to add some definition.
5. This is a new way to tightline your eyes. Take your eyeliner brush then spray some water then take any matte black shadow. Then you can start tightlining your eyes.
6. Curl your lashes and apply mascara.
7. Apply cream blush. Make sure you blend well to achieve a natural looking blush.
8. Set off everything with a powder but dont apply it all over your face to achieve that dewy glow.
9. Apply lipstick  on your lower lips then blend it using your finger and then apply lipbalm.

So here's the final look with my usamimi headband :)

    I hope you enjoy this tutorial and I will talk to you on my next blog :)Thank you so much and
Stay Fabulous!


xoxo,
Miss Bee

Tuesday, February 28, 2012

Green and Gold Makeup Tutorial: For Standard Eyes and Monolids


Hey Everyone,

     I'm back for another makeup tutorial for all you ladies out there. Last weekend, I helped my friends in their garage sale. My friends gave me some makeup and one of them is the Beauty Angel Palette. It has 12 eye shadows and 2 blush. The shadows comes with shimmery,satin and semi matte shades.

   I decided to use this palette today just because. I decided to use green and gold so if you want to learn how I did this look, stay tune and let's jump into everything.

Products Used:
Beauty Angel Palette

Inside the Palette
NYX nude on Nude


Other eye products
Face Products


Lip Products


Preparation:
    As always, I already prep my face with toner,moisturizer,primer and foundation.


Procedure:
Eyes
1. Apply primer on your lids and under your lower lash line.
2. Take the gold shade and apply it on the inner 2/3 of you lids. Make sure you spread it evenly.
3. Next, take this light green shadow and apply it on the outer third of your lids and work you way in the crease area.
4. Take the medium shade of green from the palette (thyme-ish) and apply it on your outer V. Blend it well together with the other 2 shades we applied earlier.
5.  Take this darkest green shadow and blend it together with the medium green shade.
6. Now to add more definition on your eyes,black shadow from the same palette and apply it on the outer corner of your eyes in circular motion working your way a little bit in.
7. Blend..Blend...Blend...
8. Apply highlight on your brow bone. Now as much as I want to use all the shades in the palette, I think it's best to use a matte light shadow for your brow bone because we already have a lot of shimmers going on. Apply it also on the inner V of your eyes and blend it together with the gold shade.
9. Iight line using an eye pencil  and use a liquid liner to line your upper lash line.
10. Apply the darkest shade of green on your lower lash line.
11. Curl you lashes and apply mascara.

Face:
1. To clean off the fall outs, apply foundation again and concealer if you need more coverage then blend it well on your face.
2. Contour the hallows of your cheeks and apply blush. Take the pink blush from the same palette.

Lips
1. Line your lips and blend it well all over your upper and lower lips.
2. Take this nude lipstick and top it off with lip gloss.


And we're done! You can wear this look during daytime and if you want to wear this for night time, you can make it look more dramatic by intensifying the black shadow and apply half or full fake lashes.

I hope you find this tutorial helpful and I'll talk  to you on my next blog! Stay Fabulosa!!!

xoxo,
Miss Bee


Monday, February 20, 2012

DIY Iced Green Tea Eye Pads- Bid Puffy Eyes Goodbye!

Hello Everyone,

     Have you ever suffered from swollen eyes due to lack of sleep, astigmatism or from crying yourself to sleep last night because you broke up with your bf/gf? swollen eyes can make us look tired even after sleeping for 8hrs.You can also get puffy eyes by drinking water too much before going to bed. Although you can get a lot of good health benefits by drinking a lot of water everyday, drinking water before bed will cause your eyes to swell. That's because the water will not be eliminated from your body when you sleep.

    Anyway, I've suffered from this too many times before so I tried to look for some ways on how to reduce this or totally get rid of the annoying puffy eyes.I swear by Purederm Puffy Eyes Minimizing Patche.  It  will totally get rid of your eye bags in just one night. But this is too expensive to use on a daily basis plus it will only minimize the under eye bags. Sometimes, when you suffer from astigmatism, you tend to get swollen eyes in the morning as if you just got bitten by some insects or sometimes when you cry yourself to sleep your lids tend to become puffy as well.

   While I was enjoying my cup of green tea, I thought that maybe I can make my own eye pads using this. Green tea has a lot of health benefits. Is there any other food or drink reported as many benefits as green tea? There are a lot of medicinal benefits that you can get from green tea from headache to depression. It is also reputed to be helpful to some illnesses such as cancer, high cholesterol level, infection, etc.

 So enough of the blah blah blah and let's get started!

What You'll Need:
1 green tea bag
1 cup hot water
cotton pads
ziplock or any plastic container


1. Put the tea bag onto the cup of water. The let it cool down a little bit.
2. Once the tea is warm, you can start to dip each cotton pad into it.
3. Put the dipped cotton pads in a ziploc or plastic container but make sure not to layer them.
4. Let it totally cool down then put it in a fridge and there you have it!

        You can make as many pads as you can. This will save you time and energy :)
this can only fit 4 but I still put 6..


REMINDER: dont pile them up because it will be so hard to tore them apart... LEARN FROM MY MISTAKE :(


so this happens when you pile them up..

You can start to use it the next day. Thaw it out first before you place it on your eyes. Go ahead and wash your face first or take a shower. It will be ready by the time you done. These eye pads have soothing effect and can help your blood to circulate better.


           For best result, use this every morning right after you wash your face. This will take 10minutes of your daily morning routine but it sure pays. :) You will bid puffy eyes in no time!!! You can also put these pads all over your face at night. You face needs some green tea lovin' too so go ahead and use it as face mask.

Other things I do with green tea:
  I use it to rinse my face at night. So once you wash you face with a cleanser, rinse it with warm green tea.
  When steaming my face, I dont just use hot water. I add some green tea into it. You dont have to use new tea bag all the time. When I drink tea, I keep the tea bag so I can use it for my facial steam. (tutorial coming up next...)


       I hope you enjoy my DIY tutorial and for more updates, please visit my FB page and twitter and dont forget to subscribe to my YT channel too! This is all for now ladies and I'll talk to you on my next blog!


xoxo,
Miss Bee


Sunday, February 19, 2012

Adele Grammy 2012 Inspired Makeup Look


   Hey Everyone,
             I decided to recreate Adele's look on the 2012 Grammy Awards. She looked so stunning on the red carpet and her performance just gave me goosebumps so I decided to film a video trying to recreate her looks. I decided to do 2 looks because she's just so lovely I can't choose between the 2.  I would call this a tutorial because I really didn't know how the makeup artist did her makeup but I will still include the step by step procedure on how I recreated the look as well as the products I used. Anyway, I hope you enjoy this video!

Step by Step
      I already prep my face with toner, moisturizer, face primer and foundation
 1. Prime you lids as always.
2. Take 2 light shadows. Apply the lighter one on the inner corner of the eyes and the brow bones then apply the other shade on the outer half blending it together with the lighter shadow you applied earlier.
3. Take a taupe e/s then apply it on your crease to add definition to your eyes.
4. Line your eyes.
5.  Curl your lashes and apply mascara
6. Set your face with a powder
7. Contour the hollows of your cheeks and add a peach blush then blend it in to your contour shade.
8. Line your lips with a red lip liner then apply red lipstick.

Now for the second look...
1. Apply a dark shade on your crease and blend it well.
2. Change from red lips to nude pink lip shade.


Products Used:
Eyes:
Estee Lauder Deluxe Eyeshadow Compact
Ny nude on nude palette
Nyx eye lashes
Nichido brow pencil
ELF brow kit
Nichido mineral kohl pencil

Face:
Revlon photoready
Ever Bilena Advance Studio stick foundation
Maybelline shine free cake powder

cheeks:
Ever Bilena Advance 3D compact
Allue in peach pie

lips
Look 1: Nichido lip pencil in Blaze and NYX bloody mary
Look 2:nichido lip pencil rosette  and MAC Amplified


  Although I did this right after the Grammy's, it took me time before I was able to edit it.  I know you can see tons of videos about Adele's look on Grammy's but I still hope you enjoy my video.
I'll talk to you guys later and Stay Fabulous! 

xoxo,
Miss Bee